Between meal prep, cleaning, and the occasional baking kick, I spend at least an hour or so in our kitchen every day. I enjoy putting on a playlist or an audiobook and getting into the zone. But I’ll be real with you: for a long time, it was not the happiest room to be in. The walls were a drab shade of blue-gray (which really made the cheap orange cabinets pop), and the decorations were all kind of thrown together. So, after three years of living in this house, I finally decided to put in the time to make it a room I would look forward to hanging out in.
The thing is, I didn’t want to do any renovation. I didn’t have ten thousand dollars lying around to rip everything out and start fresh, and quite frankly, if I did, I would probably choose to spend it on something a little more responsible.
So, that meant no changes to the orangey-brown cabinets, laminate countertop, or dingy gray linoleum floor. They certainly aren’t what I would have chosen if I had built the house, but I had a feeling they could look a whole lot better with a little bit of styling.

Paint
The first order of business was repainting. I picked Dover White by Valspar, but after the first coat, it was looking a little to sterile for me. So I added a touch of Wheat Sheaf by PPG (leftover from our living room) into the paint tray to warm up the white. Just adding a light paint color made our tiny kitchen feel so much bigger and brighter!
I also got paintable outlet covers to replace the standard yellow-y beige ones the house came with. I think they make a huge difference, especially with white walls!
Statement Pieces
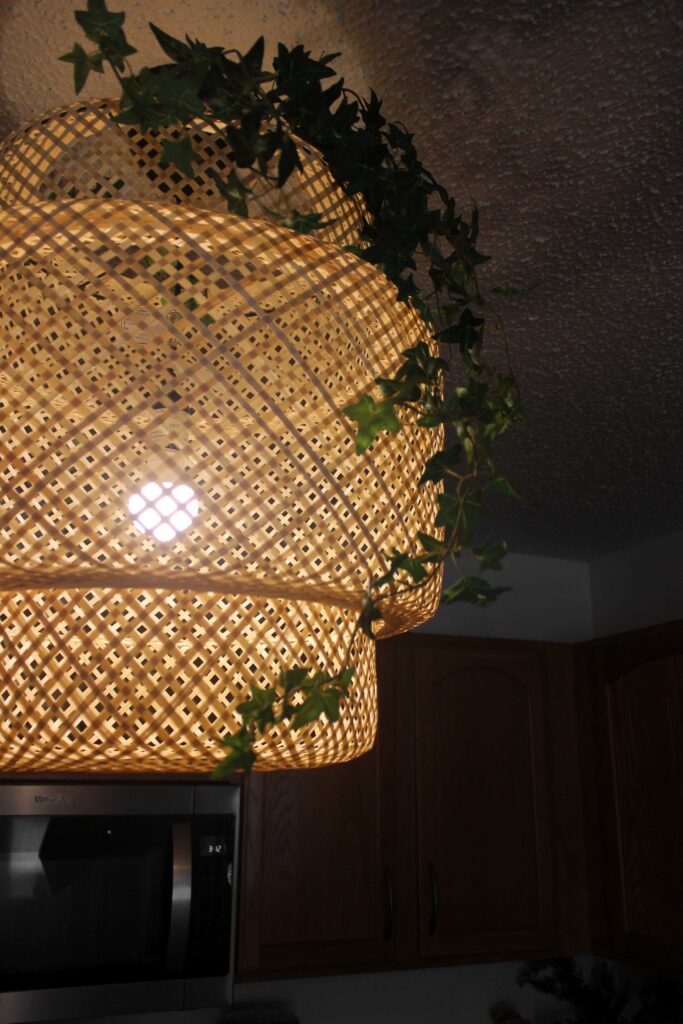
Aside from the paint, the light fixture and the rug make the biggest impact in the room. They’re the only things we bought new for this makeover.
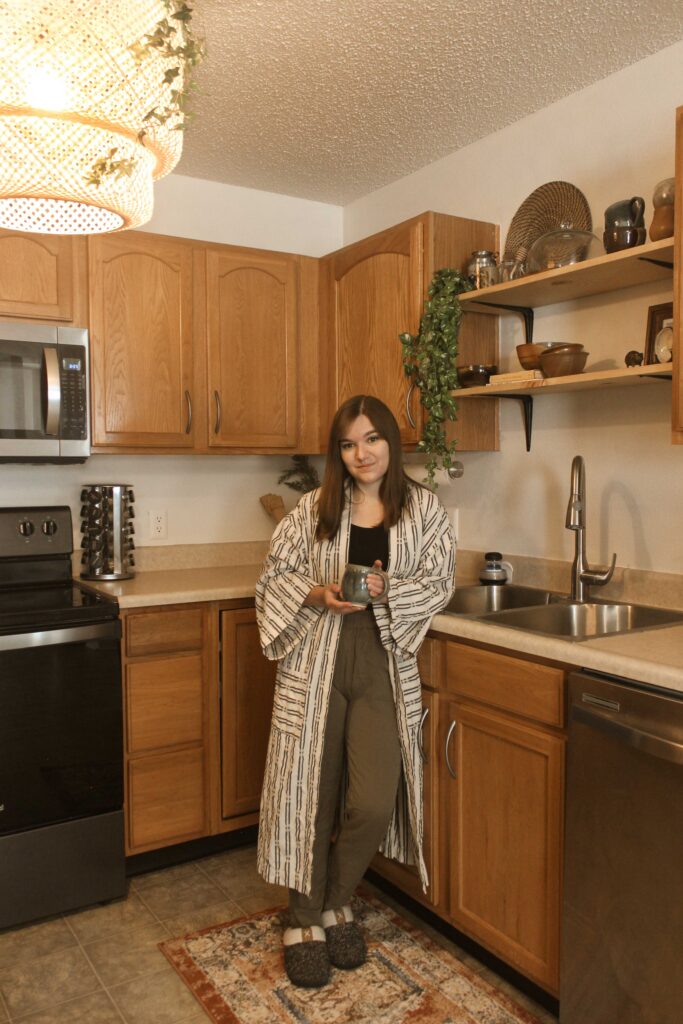
Carson and I always admire this bamboo light on our trips to IKEA, so it wasn’t too hard to pick something to replace the cheap globe lights. (Although be forewarned; this light is HUGE when you have 8-foot ceilings! Unless you have high ceilings, I definitely only recommend it for low-traffic areas or short people like us.) After Carson got it all installed (while I *supervised*), we felt like it needed some extra something, so I added faux greenery to give it more texture.
The vintage-style rug is from Wayfair. Maybe someday a genuine antique rug will be in my budget, but today is not that day. I wanted something that would be easy to clean but still feel comfortable under my feet since we spend so much time standing in this space, and this fit the bill!

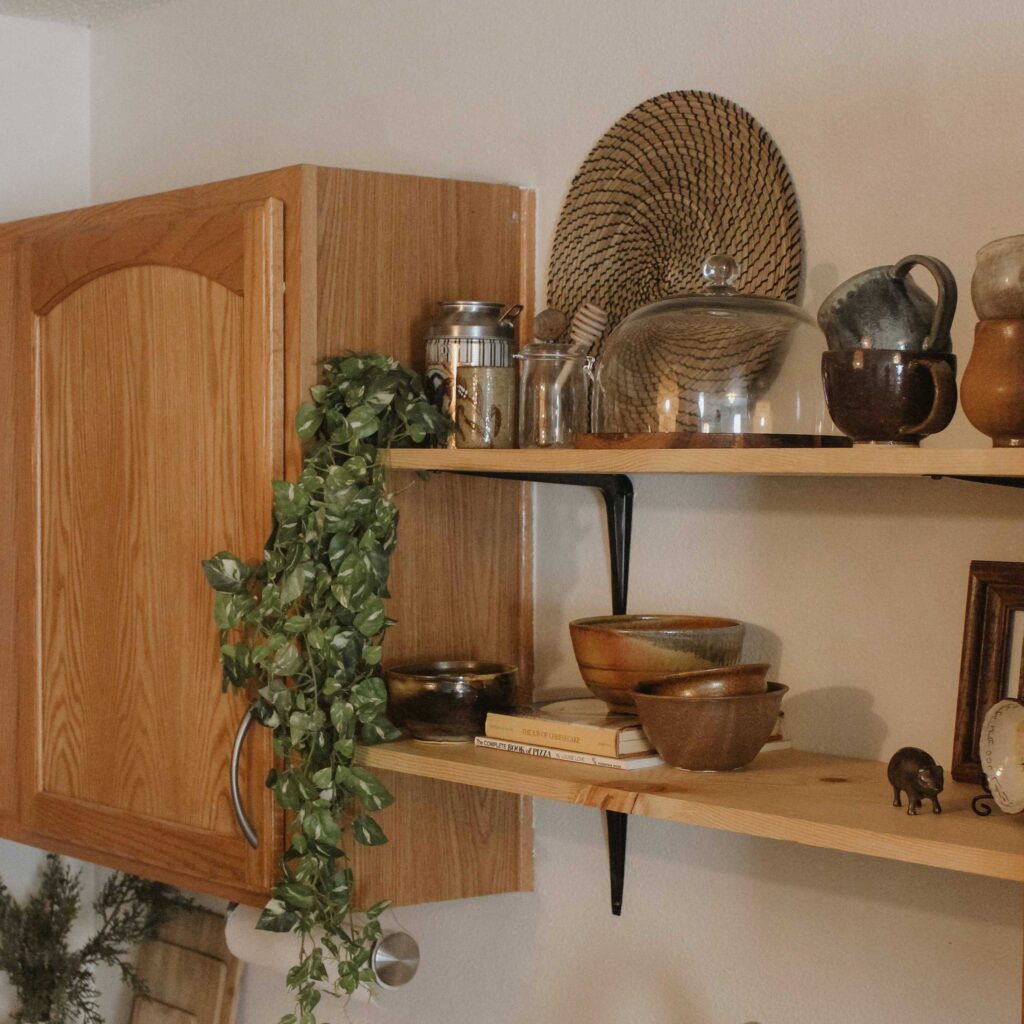
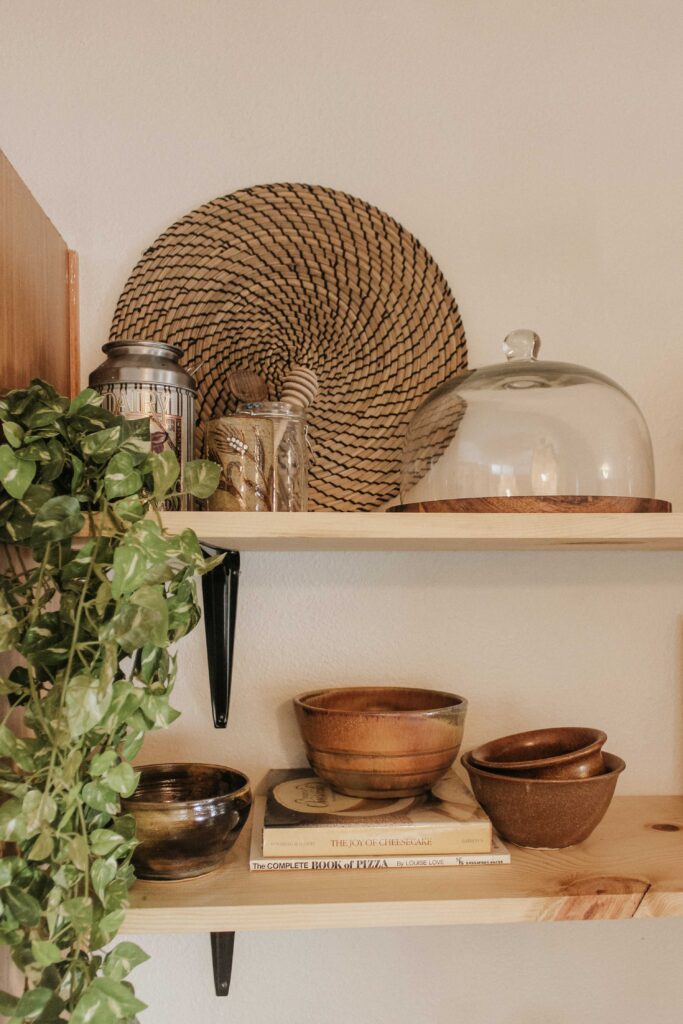
Shelves
These shelves are completely DIY. First, I got a 1″x12″x8′ pine board from Lowe’s and asked them to cut it in half at the store. When I got them home, I smoothed out the edges with a sander and coated them with food-safe wax. Then Carson and I worked together to screw on the shelf brackets and mount them on the wall. (It’s definitely a two-person job if you have the hands to spare!) And, because I’m a little bit insane, I painted over the screws with black paint so they would blend in.
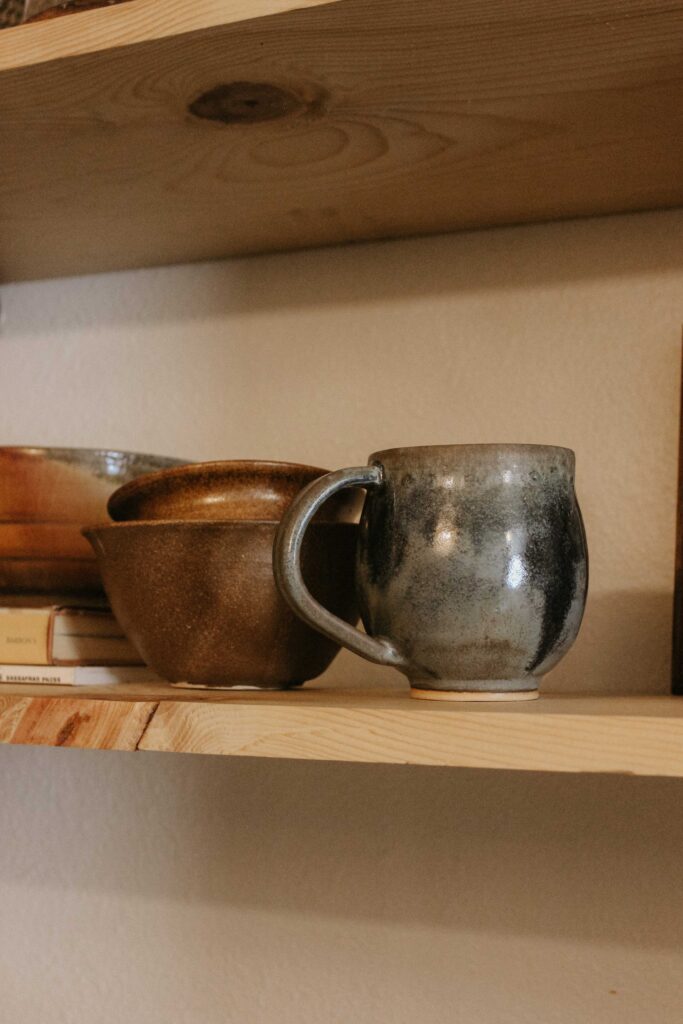
Then it was on to the fun part: decorating. I really wanted these shelves to be a combination of functional and decorative. I’m not a huge fan of buying a bunch of random stuff from a home décor store just to fill up space. I prefer things with either meaning or function. Plus, in this small kitchen, we could use the extra storage space. So, I pulled out our cutest dishware and gave it a space where it could shine.

Everything on the shelves was gathered from around the house. That said, I’m sure these shelves will change over time. I think my styling work could definitely be improved, but this is a way more approachable starting point than before.
Here’s a little overview of what’s on display:
- Basket: IKEA / our living room
- Greenery: leftover from the old kitchen design
- Milk can: from my childhood home
- Sake cup: garage sale (from the free bin!)
- Jar: Michael’s clearance section / my craft room
- Honey dipper: from my husband’s childhood home
- Decorative spoon: from my husband’s years living in Kenya
- Cake platter: thrift store
- Clay mugs: rejects from an artist friend of ours
- Clay bowls: collected from events and artist rejects
- Cookbooks: from my husband’s childhood home
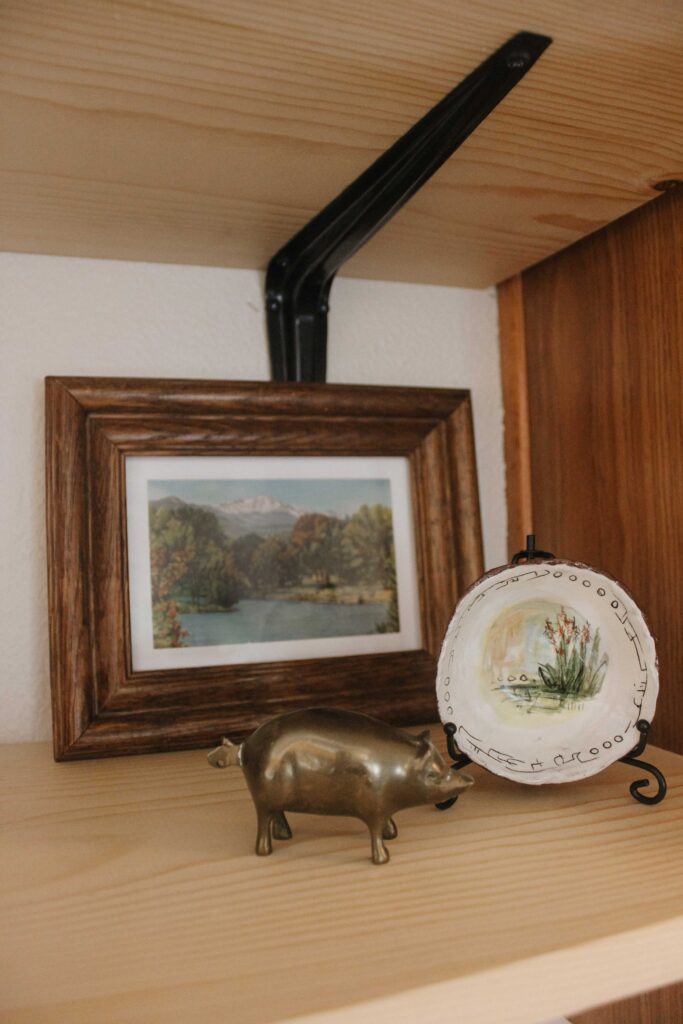
- Wooden frame: thrift store
- Vintage postcard: garage sale
- Brass pig: thrift store
- Handmade dish: Lala Gallery
(I cannot overstate how much I adore this little corner with my vintage postcard, brass pig, and handmade dish. It’s where my eyes drift to every time I use the sink.)
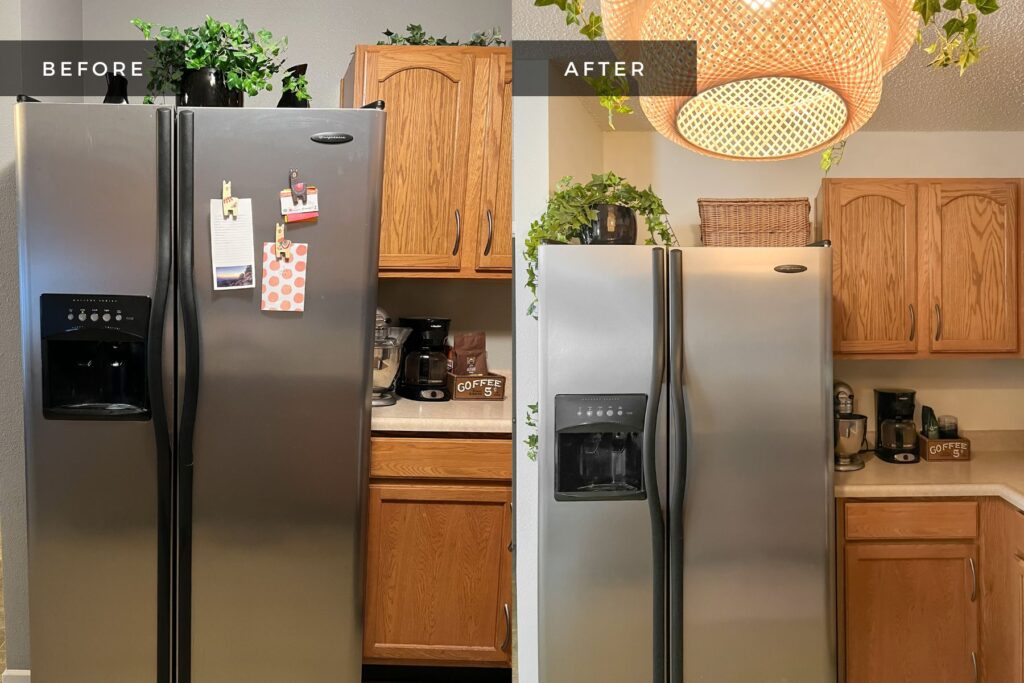
The Fridge
I honestly didn’t do a whole lot to the fridge area. The only new item was a basket I snagged from another part of the house so we could store appliance pieces on top of the fridge. (No more fighting with all of the KitchenAid attachments every time I want to mix!)
Honestly, the biggest difference might be with the styling of the planter on top of the fridge. Those curvy vases I had up there were handmade by Carson in college. I absolutely adore them, and I knew I could do so much better with them elsewhere. So I simplified the amount of knick knacks, made the space functional, and rearranged my fake foliage. (I would love to put a real pothos or vine-y plant here, but when I tell you our kitchen gets ZERO sunlight, I’m not kidding.)
Oh, and don’t worry about the llama fridge magnets. They’re still there; I just keep them on the side of the fridge when they’re not in use. I’m sure I’ll hang something new there soon, but those papers that were hanging there before had been there for literal years before I tidied up.
And that’s it! Once we’d gathered all of the supplies, the whole project took just a couple of days. Just a handful of changes made this a completely new kitchen.
I have to say, I enjoy the time I spend in here so much more now. It’s brighter, cozier, and sprinkled with things that fill my brain with serotonin. Plus, I’m more motivated to keep everything tidy so I can enjoy how nice my kitchen looks.
What do you think? Is there anything else I should change in this room? I’m open to ideas!

Leave a comment